
You have finally decided to create your own NFT, but the problem is that you don’t know how to do it?
In this guide, we show you all the steps you need to take to create and sell your first NFT.
1 – Design your NFT
Before moving on to the on-chain creation process of your NFT, you must first create the “artwork” that will represent it. This work can be a drawing, a photo, a video, a music, a 3D model, the choice is yours.
In case you want to create your own NFT, here are some applications and software that could be useful:
- Photoshop (drawing, photo editing, etc.)
- Photopea (free version of Photoshop)
- Canva (design, retouching, etc.)
- Blender (3D modeling, animation)
The main thing is to create a visual whose graphic style corresponds to you, and if possible which is different from most of the NFT that we are used to see.
2 – Create your NFT on the Opensea marketplace
After creating your artwork on the software of your choice, you then need to register it on the blockchain to make it an NFT.
For this, there are several options available to you. But for the sake of simplicity, we will create it on the Opensea marketplace which offers within its platform a system for creating NFTs.
As a reminder, Opensea is a platform that allows you to buy, sell and exchange NFTs from the most used blockchains of this ecosystem (Ethereum, Polygon, Solana, Avalanche, etc).
It is now considered to be the largest NFT marketplace in the world in terms of exchange volume, despite growing competition.
Once your NFT is created, you will be able to sell it directly on this marketplace.
3- Import and configure your artwork on Opensea
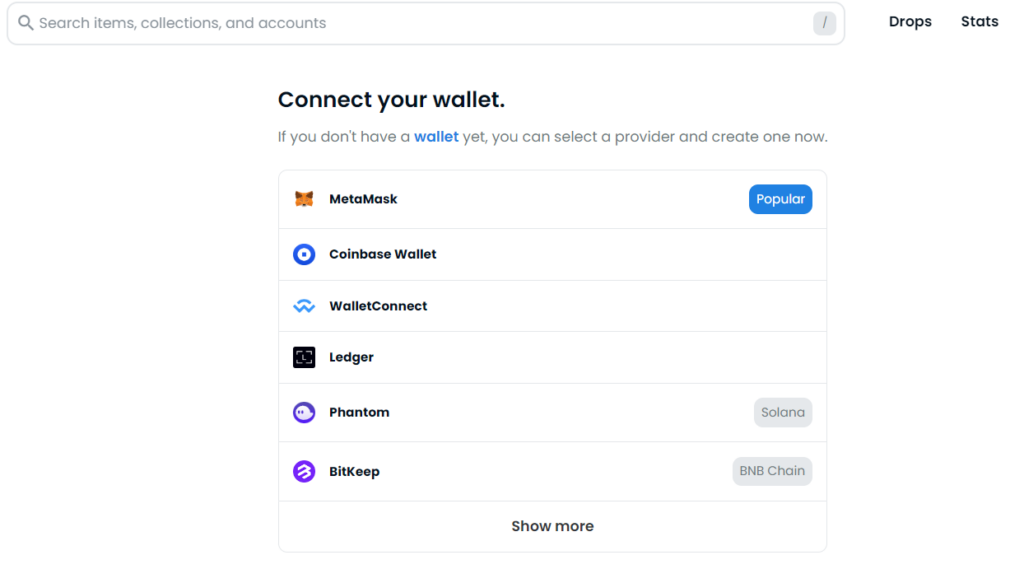
First of all, go to the “Opensea.io” marketplace, click on the small logo representing a wallet, and then select the wallet you want to connect with.
You will find the most popular digital wallets in this field, namely Metamask, Coinbase Wallet, Ledger (application), or Phantom to name a few.
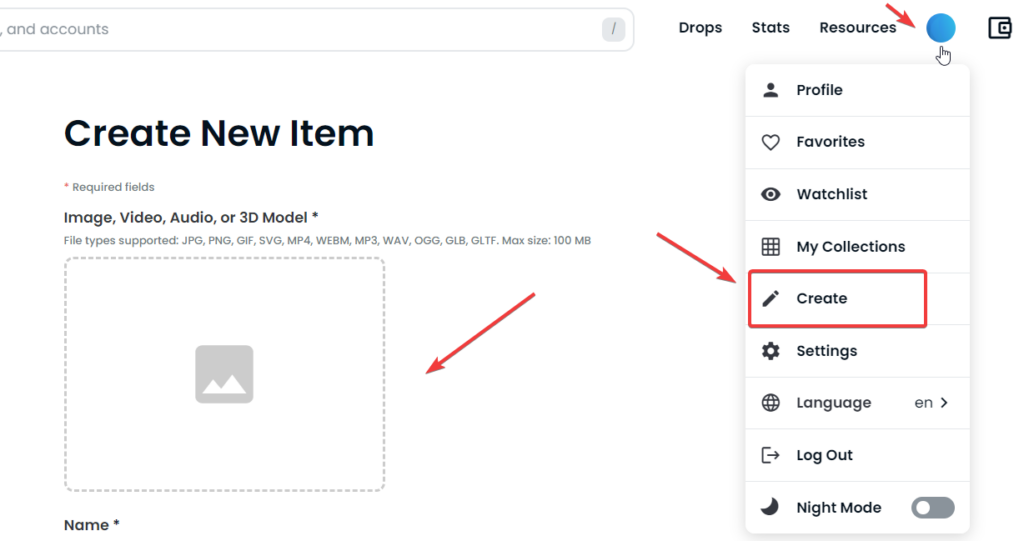
Then, slide your cursor over your profile logo and click on the “Create” tab.
It is on this page that you will be able to fill in all the information related to your future NFT. Start by importing your artwork made beforehand by clicking on the “image” logo (or by dragging the file directly over it).
You now need to :
- Enter the name of your NFT
- Add a link (web page, etc) that will be visible on your NFT page
- Add a description
- Add it to an existing collection (optional)
- Fill in its properties (attributes) as well as other numerical characteristics (levels, statistics) if necessary
- Enter the supply (quantity)
- Select the blockchain where you want to register it
Once you have filled in all these data, simply click on “create” and validate the transaction on your wallet.

Congratulations, your NFT has been created, you can now find it on your profile in the “created” section.
4 – Sell your NFT on the Opensea marketplace
One of the advantages of Opensea is that you can list your newly created NFT for sale in just a few minutes.
To do this, go to the “created” or “collected” section of your profile (where your NFT is located), then simply click on “List for Sale“.

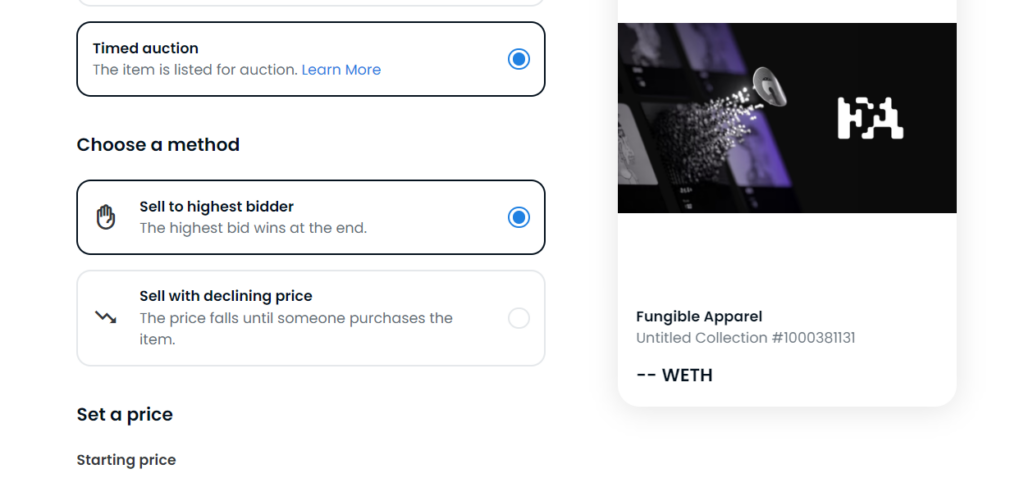
Then, click on “Fixed Price” to sell your NFT at a fixed price, or click on “Timed Aunction” to auction it.
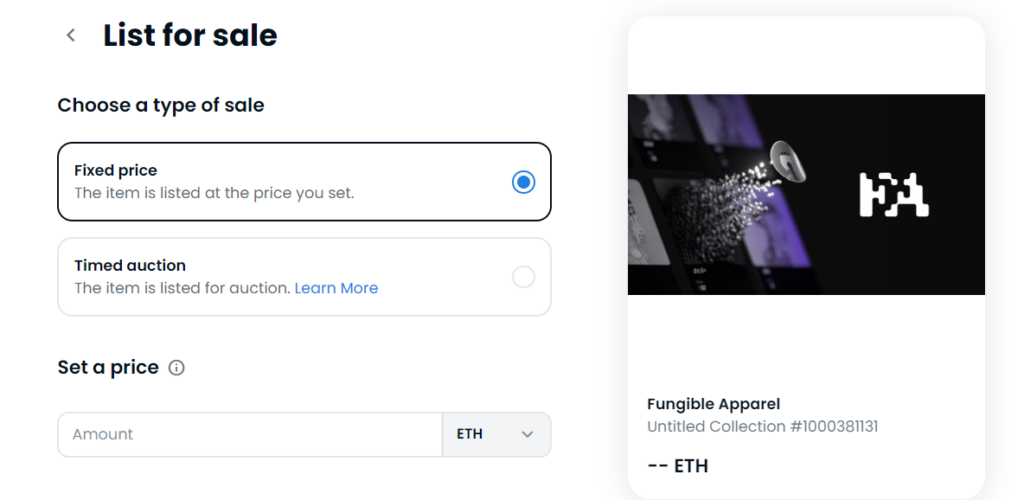
If you choose the second option, you will have to choose to sell your NFT to the highest bidder (Sell to Highest bidder), or to sell it to the first buyer, but with a price that declines over time (Sell with declining price).
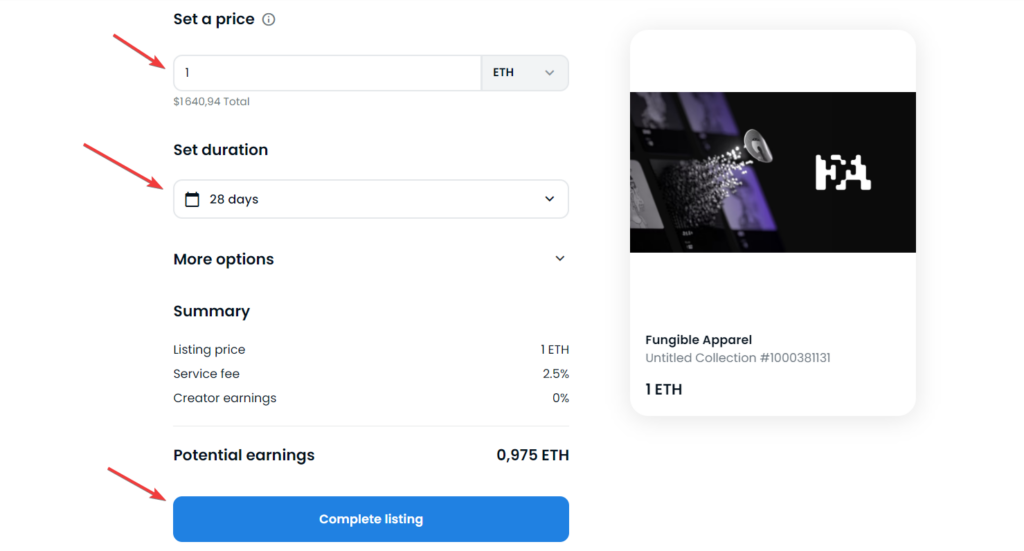
For the first option (Fixed Price), you just have to enter a fixed amount (in ETH or MATIC) that users will have to pay to buy your NFT. Finally, all you have to do is to enter the duration during which your NFT will be on sale, click on “Complete Listing“, then confirm the transaction on your wallet.
We hope this article has been useful to you!